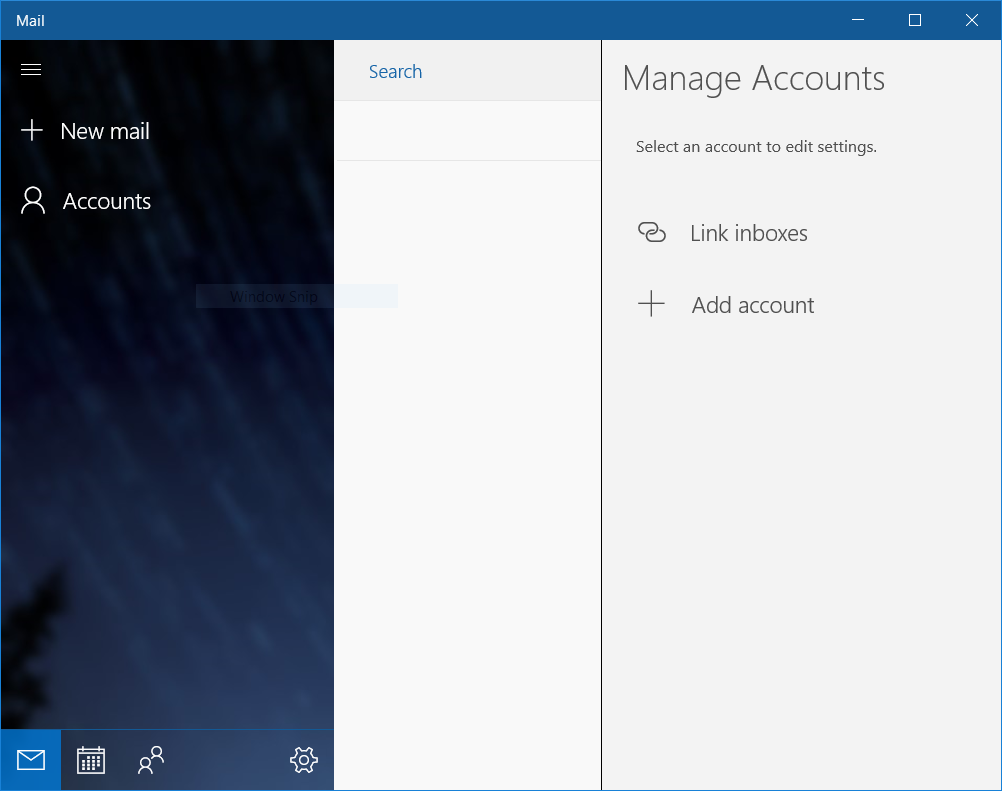
Start Mail, and click "Accounts". The "Manage Accounts" pane appears.
Click "+ Add account". Scroll all the way down and click "Advanced setup".
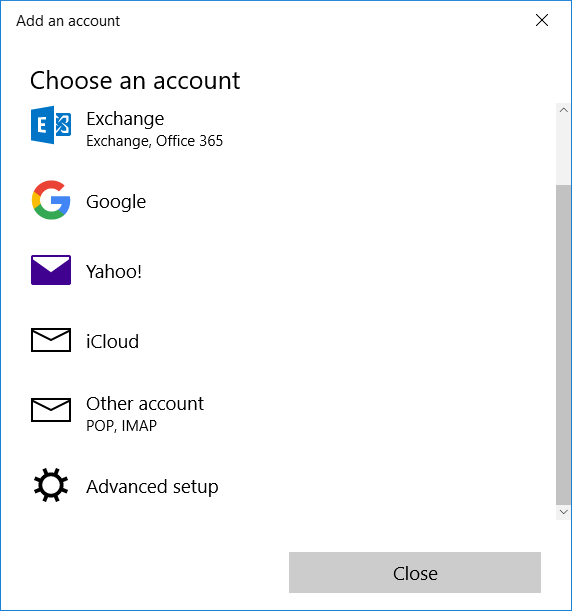
In the "Advanced setup" window, click on "Internet email".
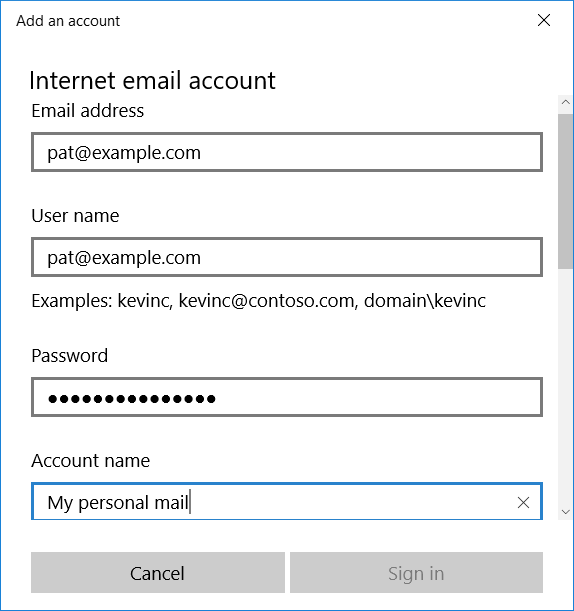
Enter your full email address into both the "Email address" field and the "User name" field. Enter your email account password. In the "Account name" field, enter a display name that will help you identify this account.
Enter your name as you'd like it to appear on the "From" line of your outgoing email messages.
Enter securemailserver.ca for both "Incoming email server" and "Outgoing (SMTP) email server".
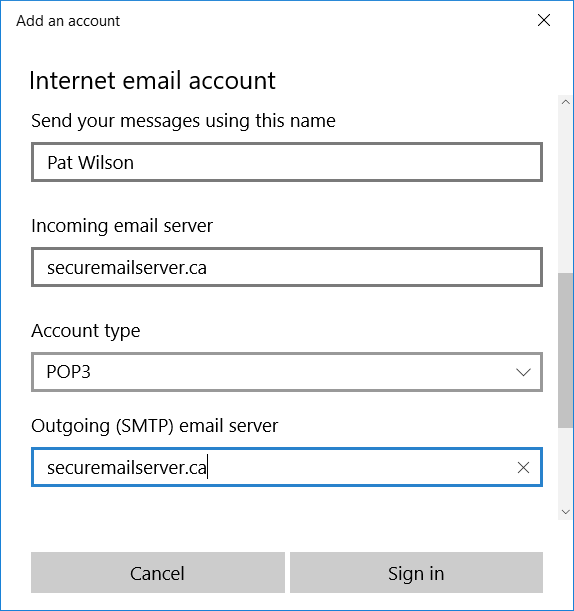
Leave all the checkboxes checked. Click "Sign in".
Click the "Done" button to close the "Add an account" window.
