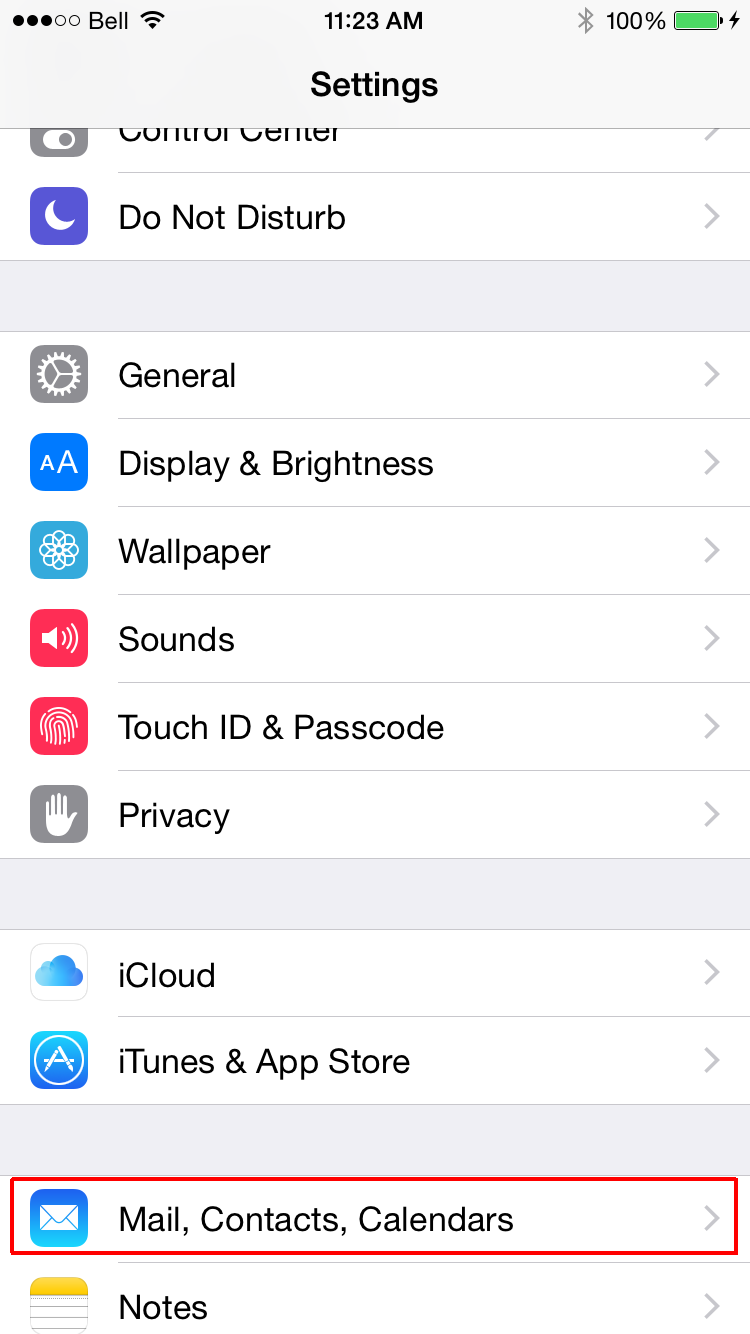
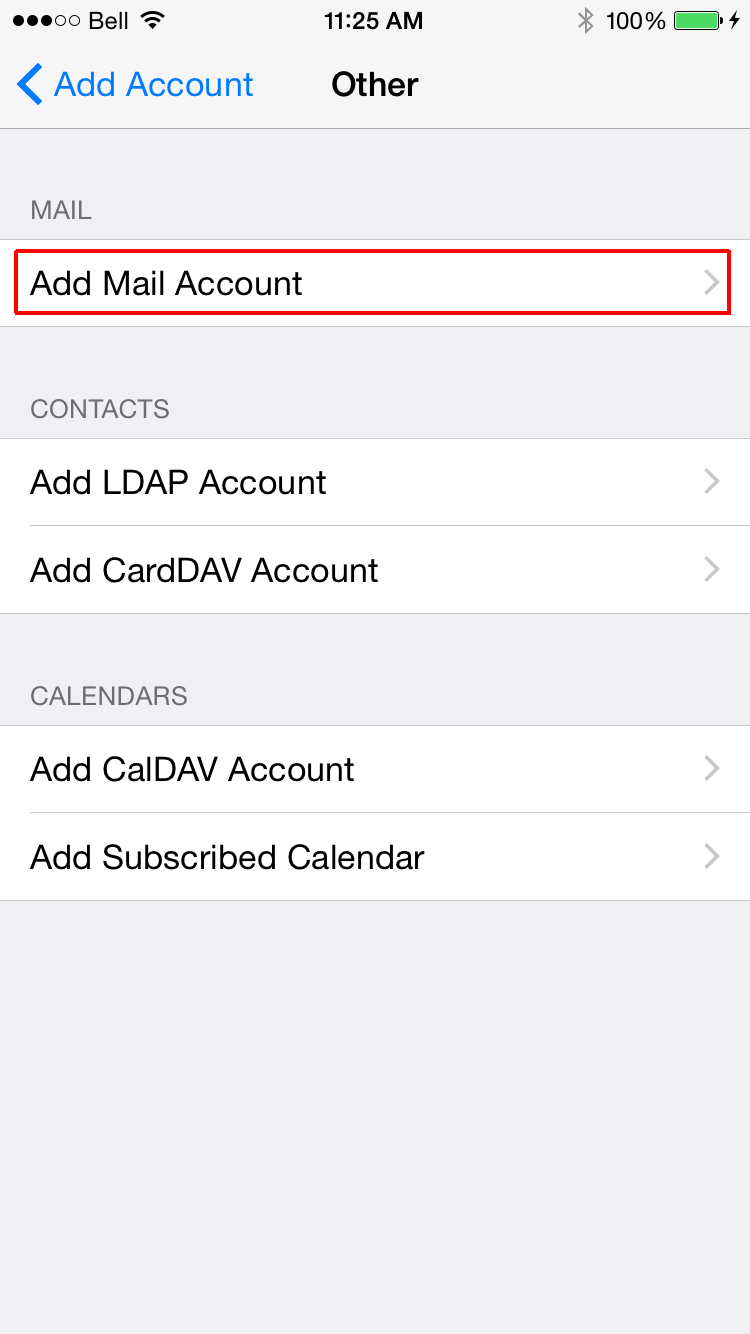
On the "Settings" screen, scroll down and touch, depending on your iOS version:
"Mail, Contacts, Calendars" or "Passwords & Accounts" or "Accounts & Passwords".
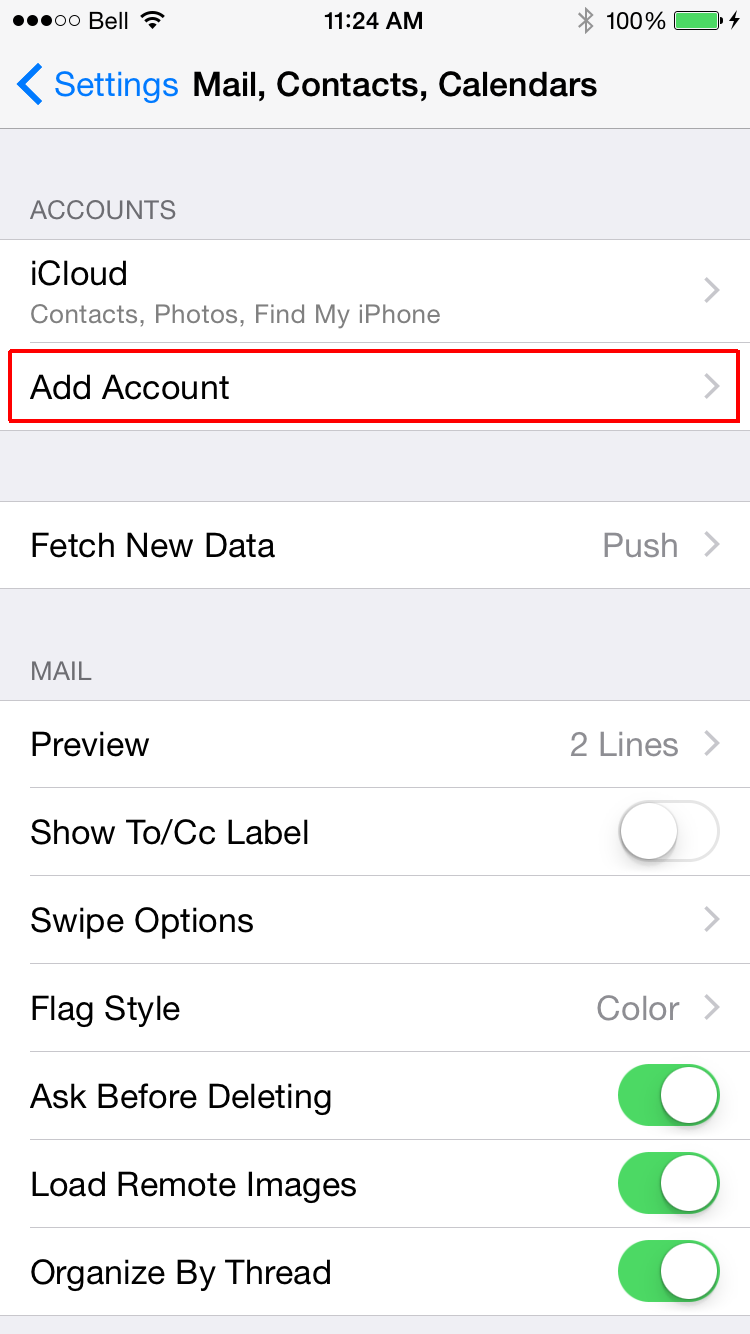
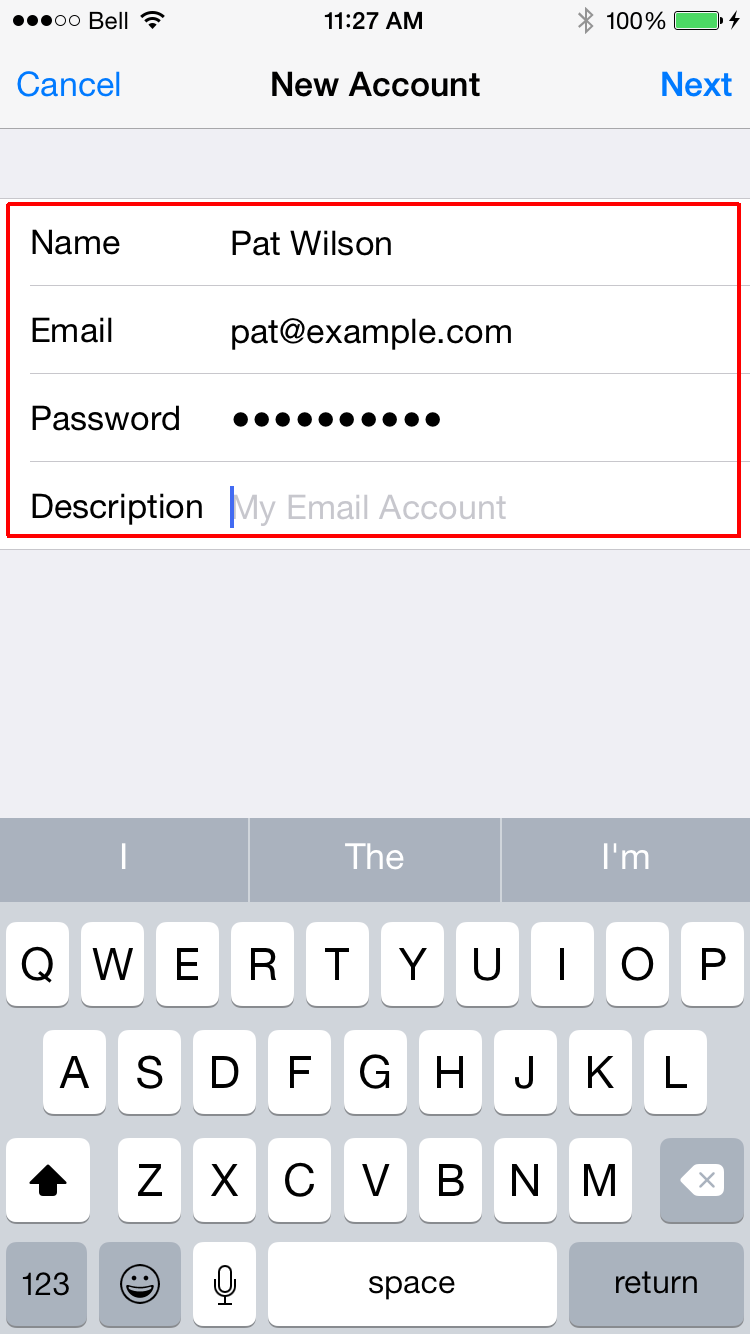
Enter your full email address, your email account password, and an optional description.
Touch "Next".
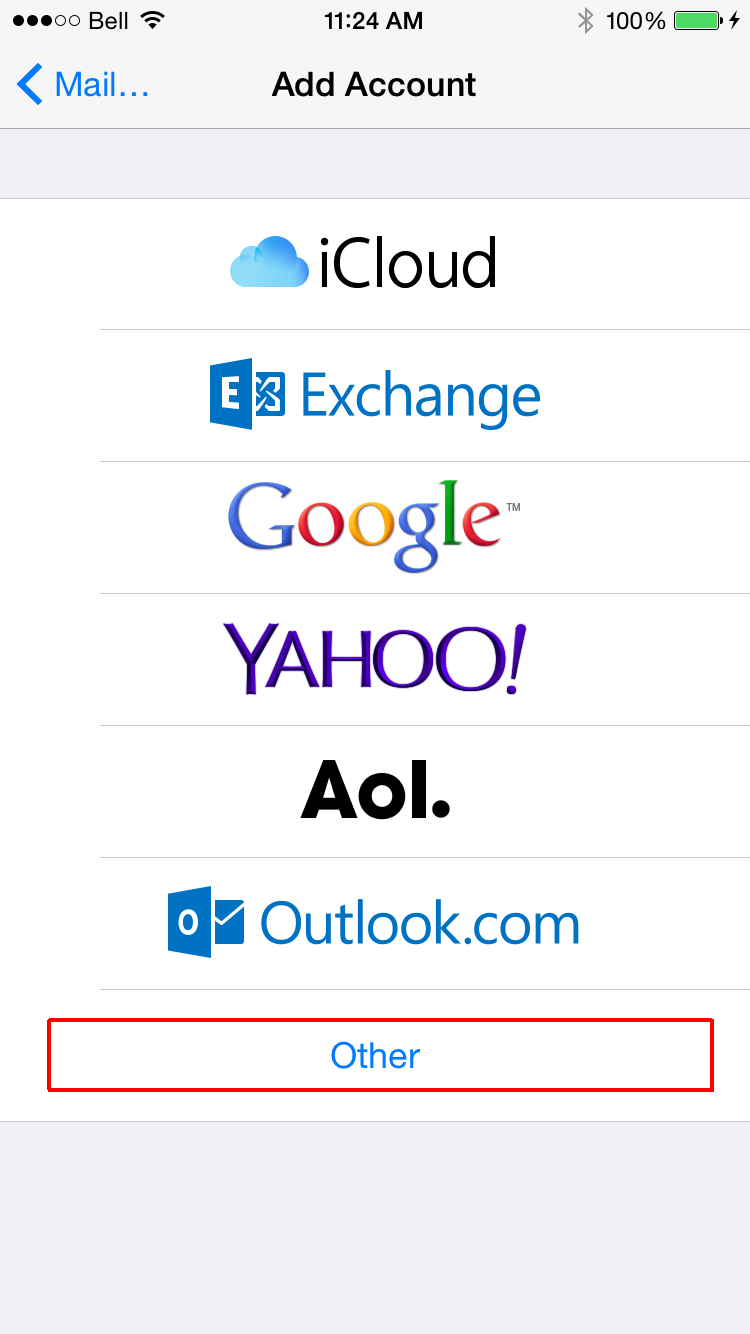
- If you'll be using this email account on multiple apps or devices, choose IMAP.
- If you're only using this account on this device, choose POP.
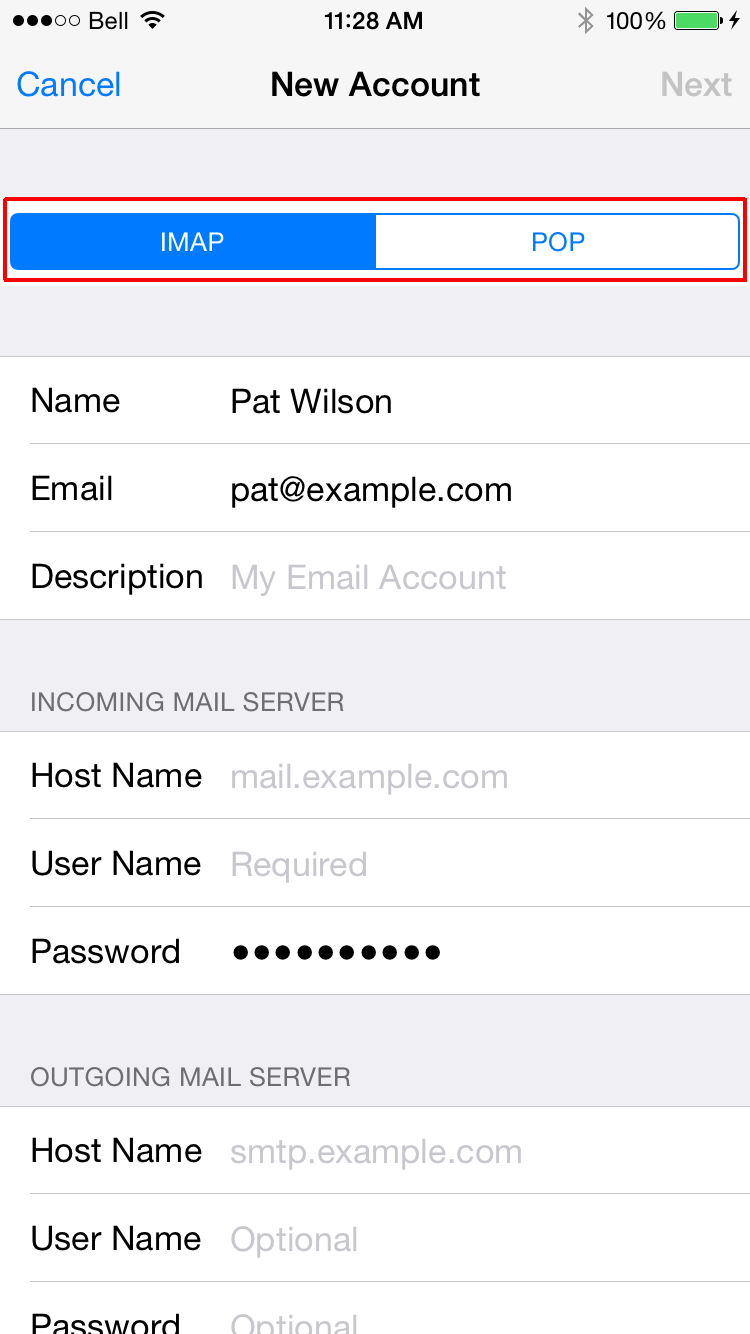
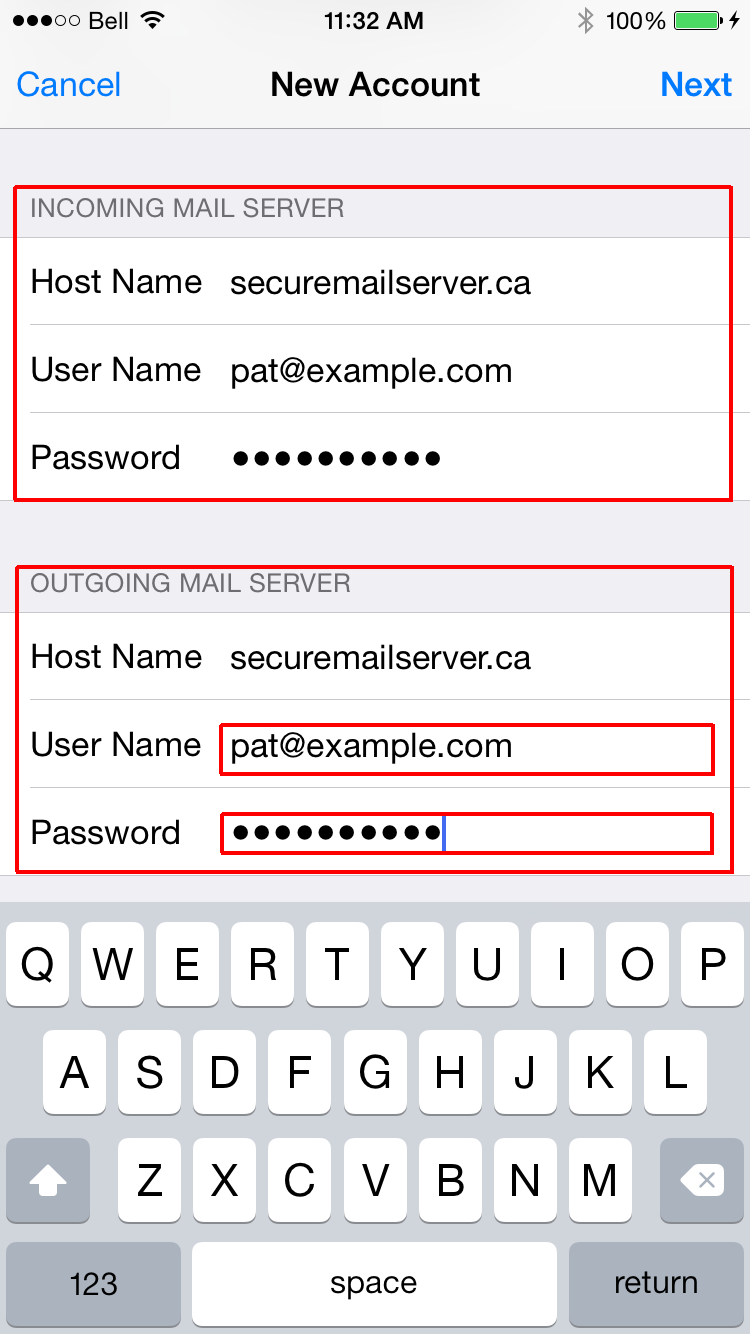
Enter your full email address in the "User Name" field.
Enter the same information under "Outgoing Mail Server", and enter the password in the "Password" field. These fields may be labeled "optional", but they are required.