Go to the Applications screen and touch "Email". If this is the first account added to this device you will be directed to the account setup screen. If you already have accounts configured in this device, touch "Add account".
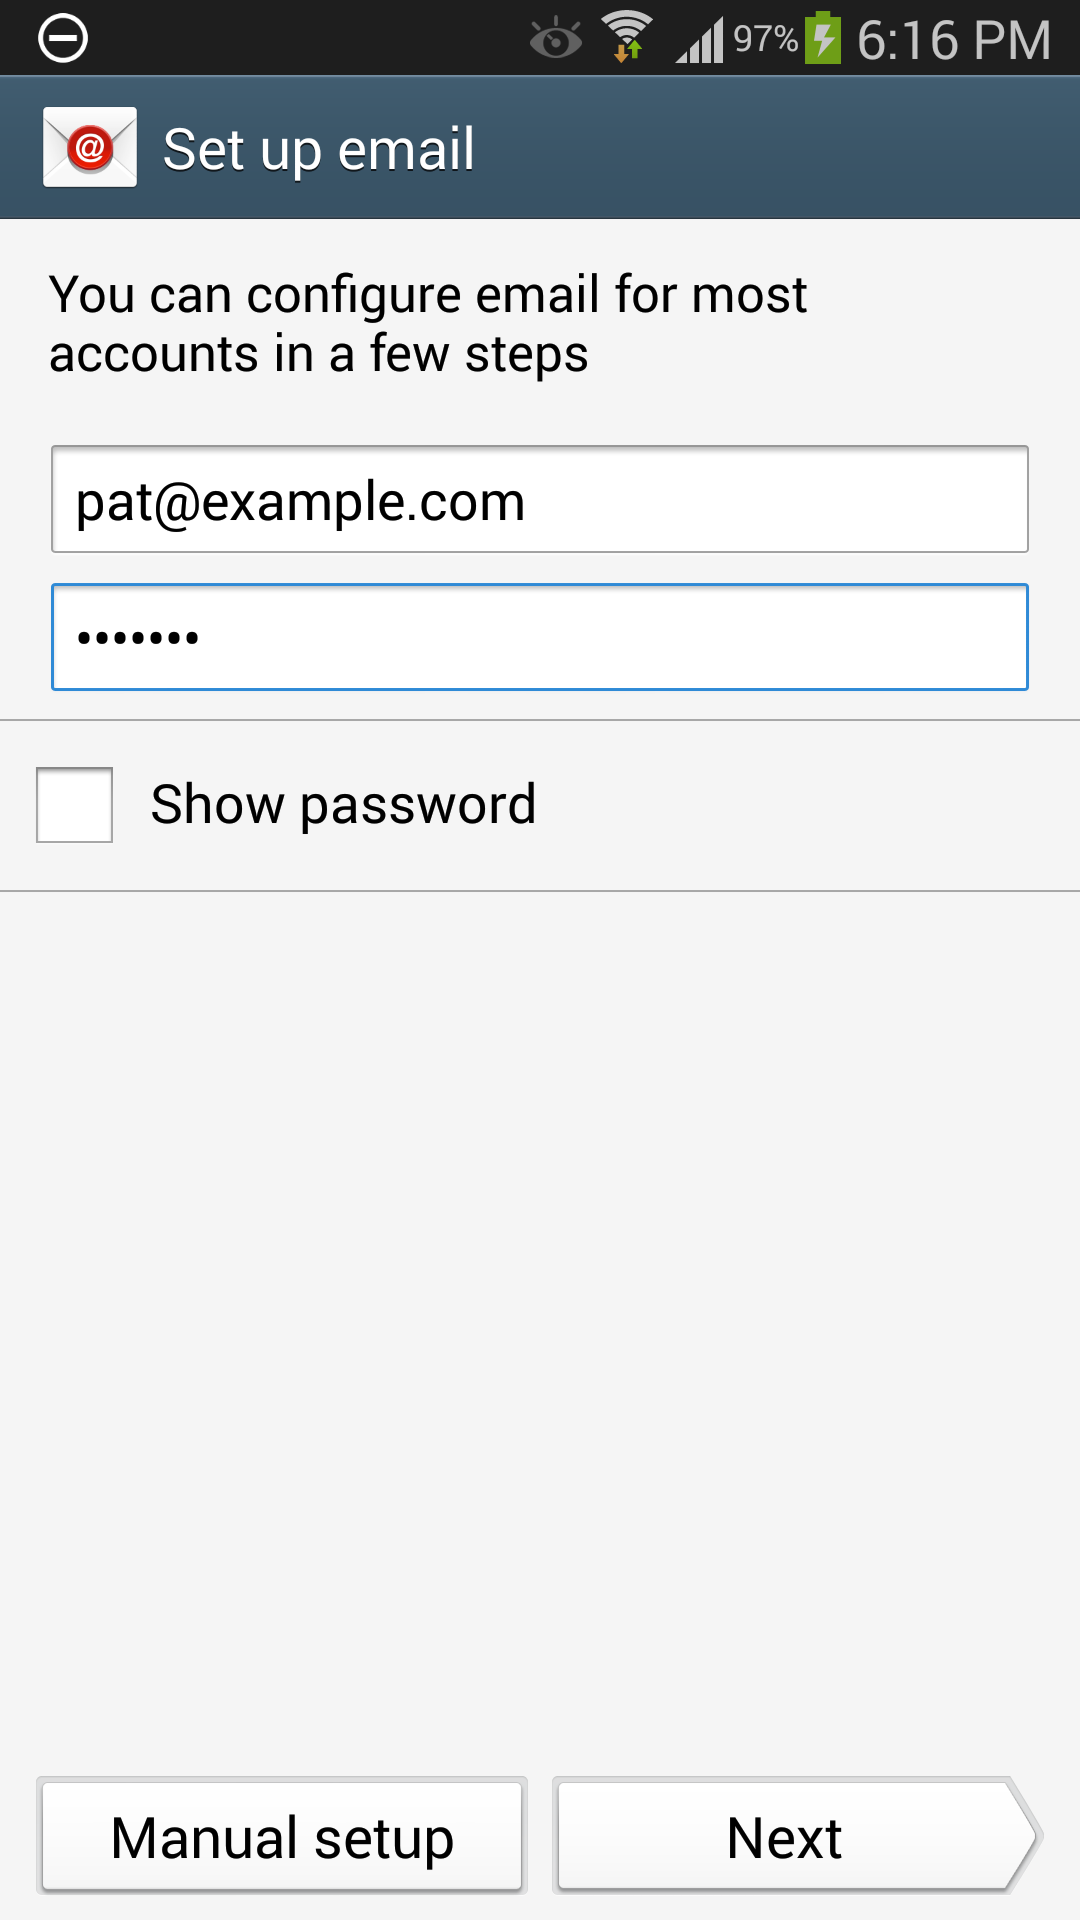
Enter your full email address and your email account password, and then touch "Manual setup".
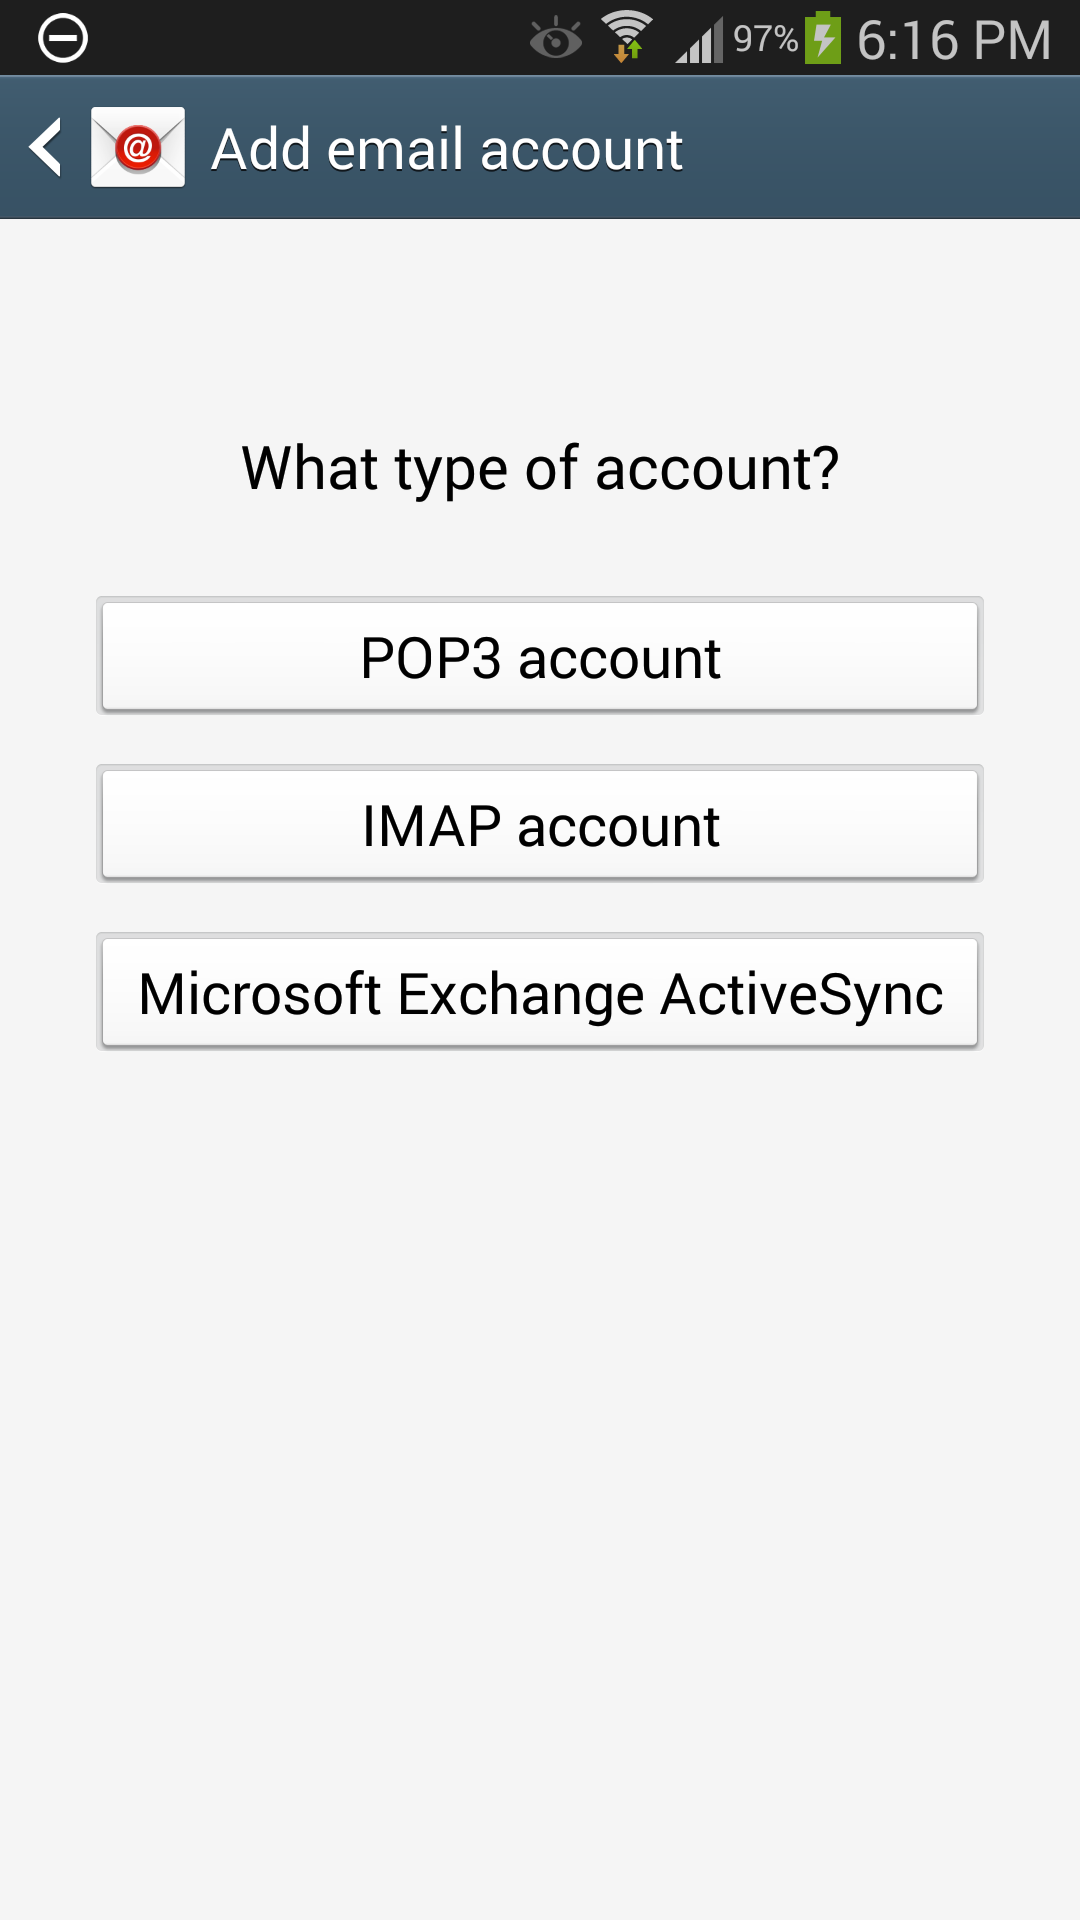
Choose the type of account you wish to create. If you'll be using your Android device exclusively to get your mail, choose POP3. Otherwise, choose IMAP.
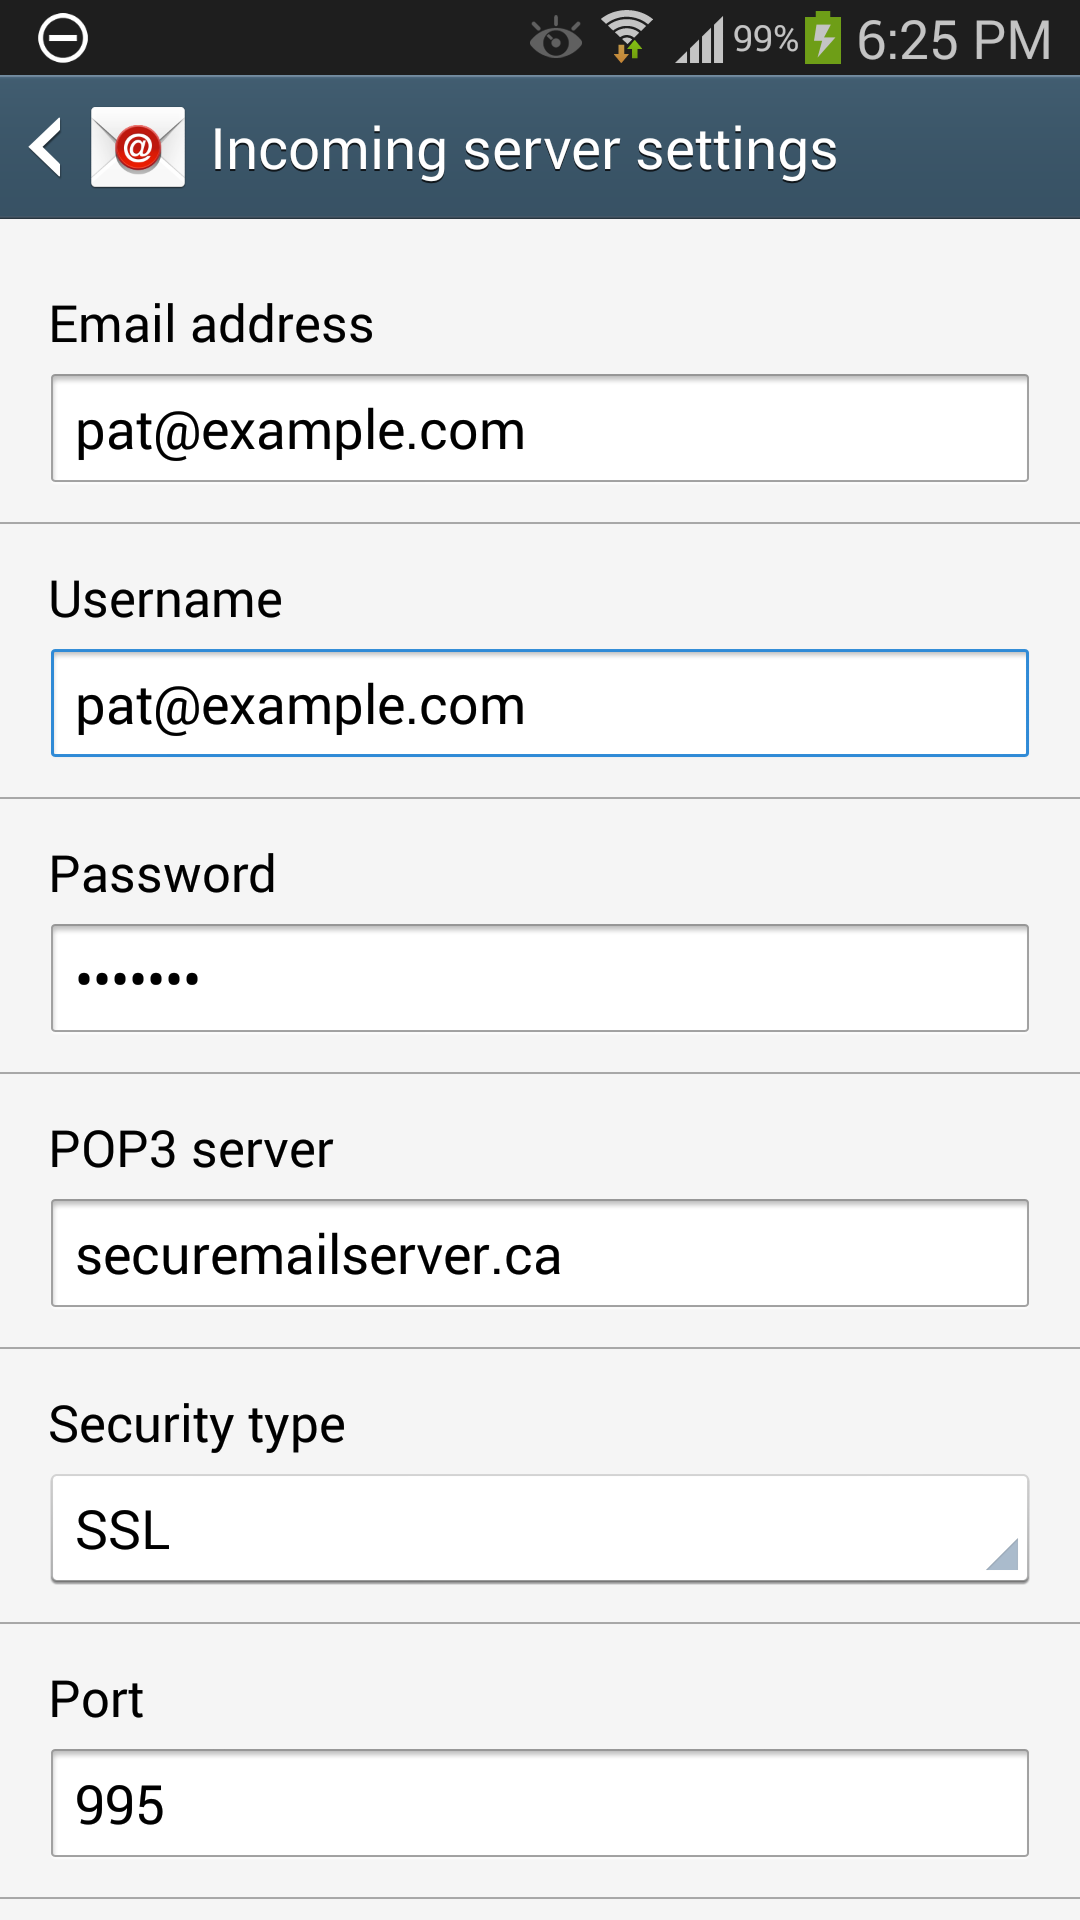
On the "Incoming server settings" screen, enter securemailserver.ca in the field labelled "POP3 server" or "IMAP server". Choose SSL as the "Security type". Your device will choose the correct port for you (995 for POP3 or 993 for IMAP).
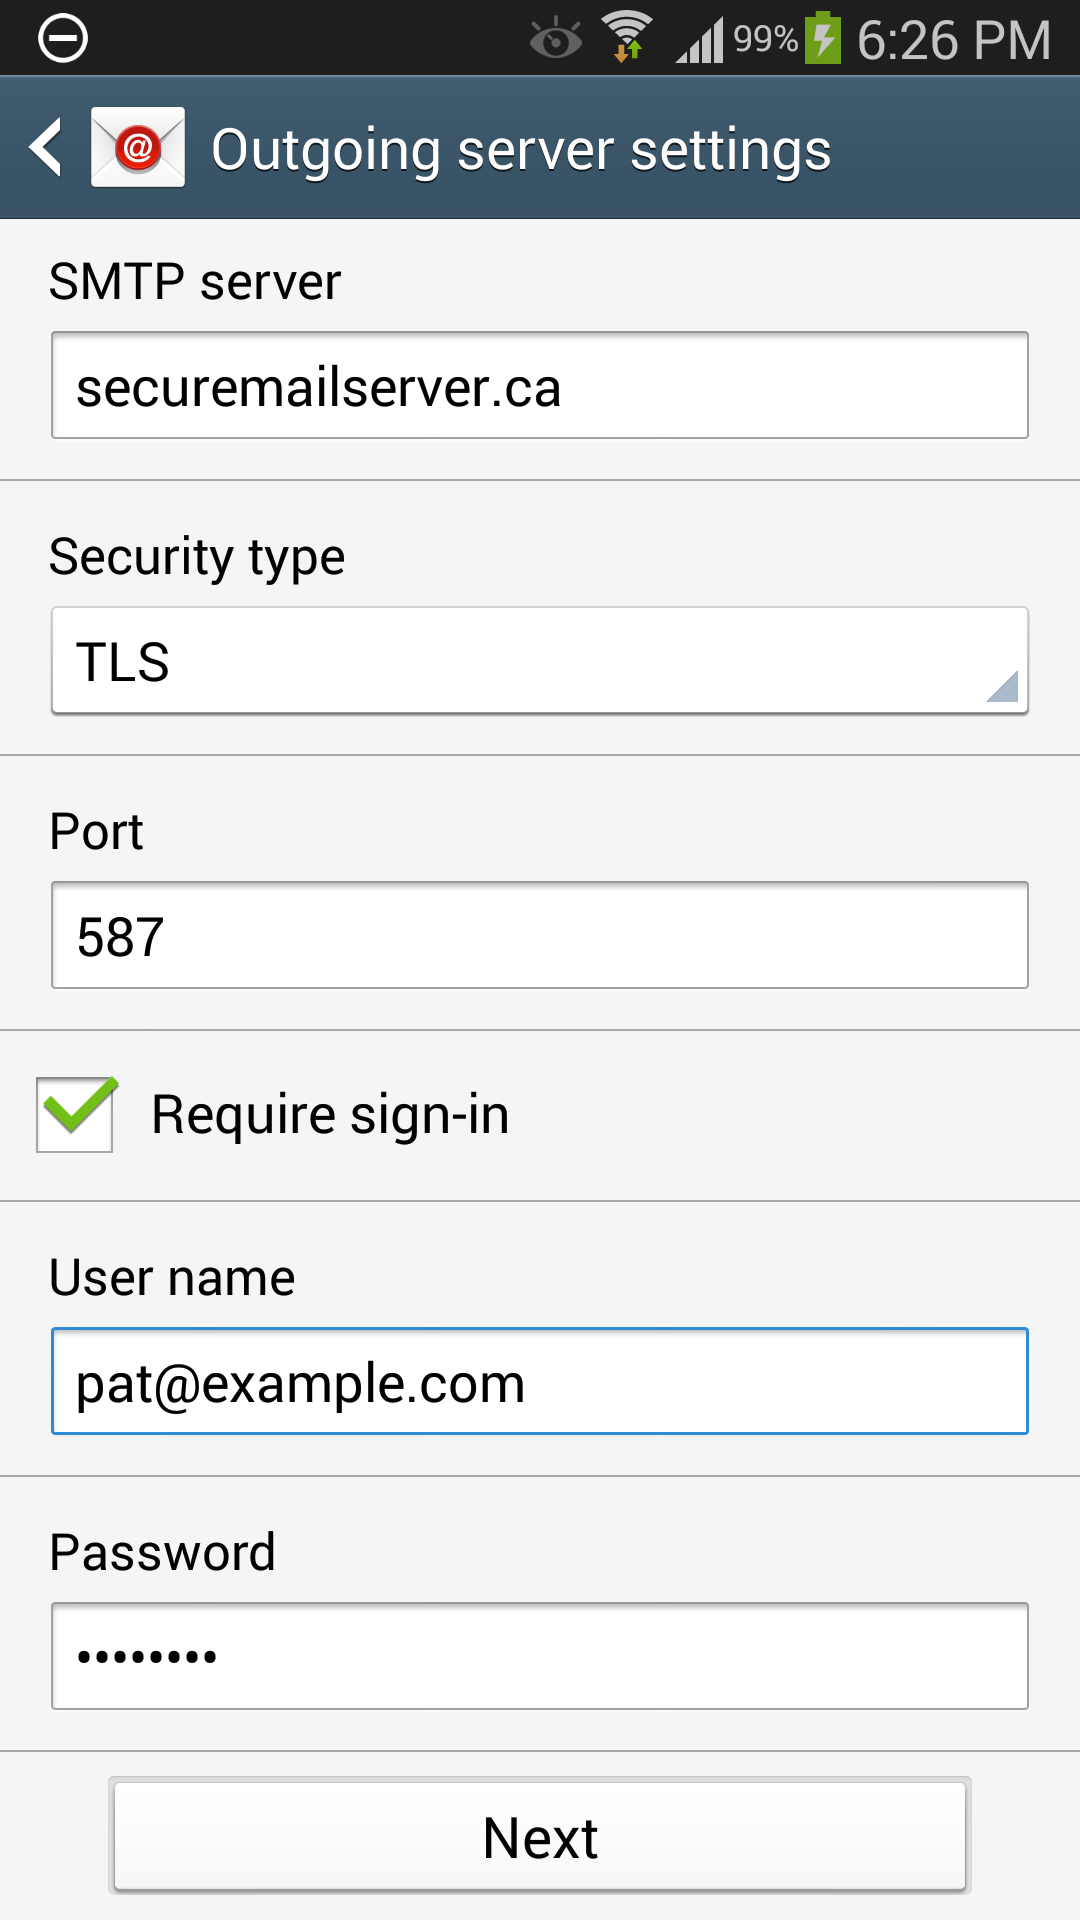
On the "Outgoing server settings" screen, enter securemailserver.ca in the field labelled "SMTP server". Choose TLS as the "Security Type", and enter the number 587 as the "Port". Check the box labelled "Require sign-in", and enter your full email address and your email account password in the indicated fields.
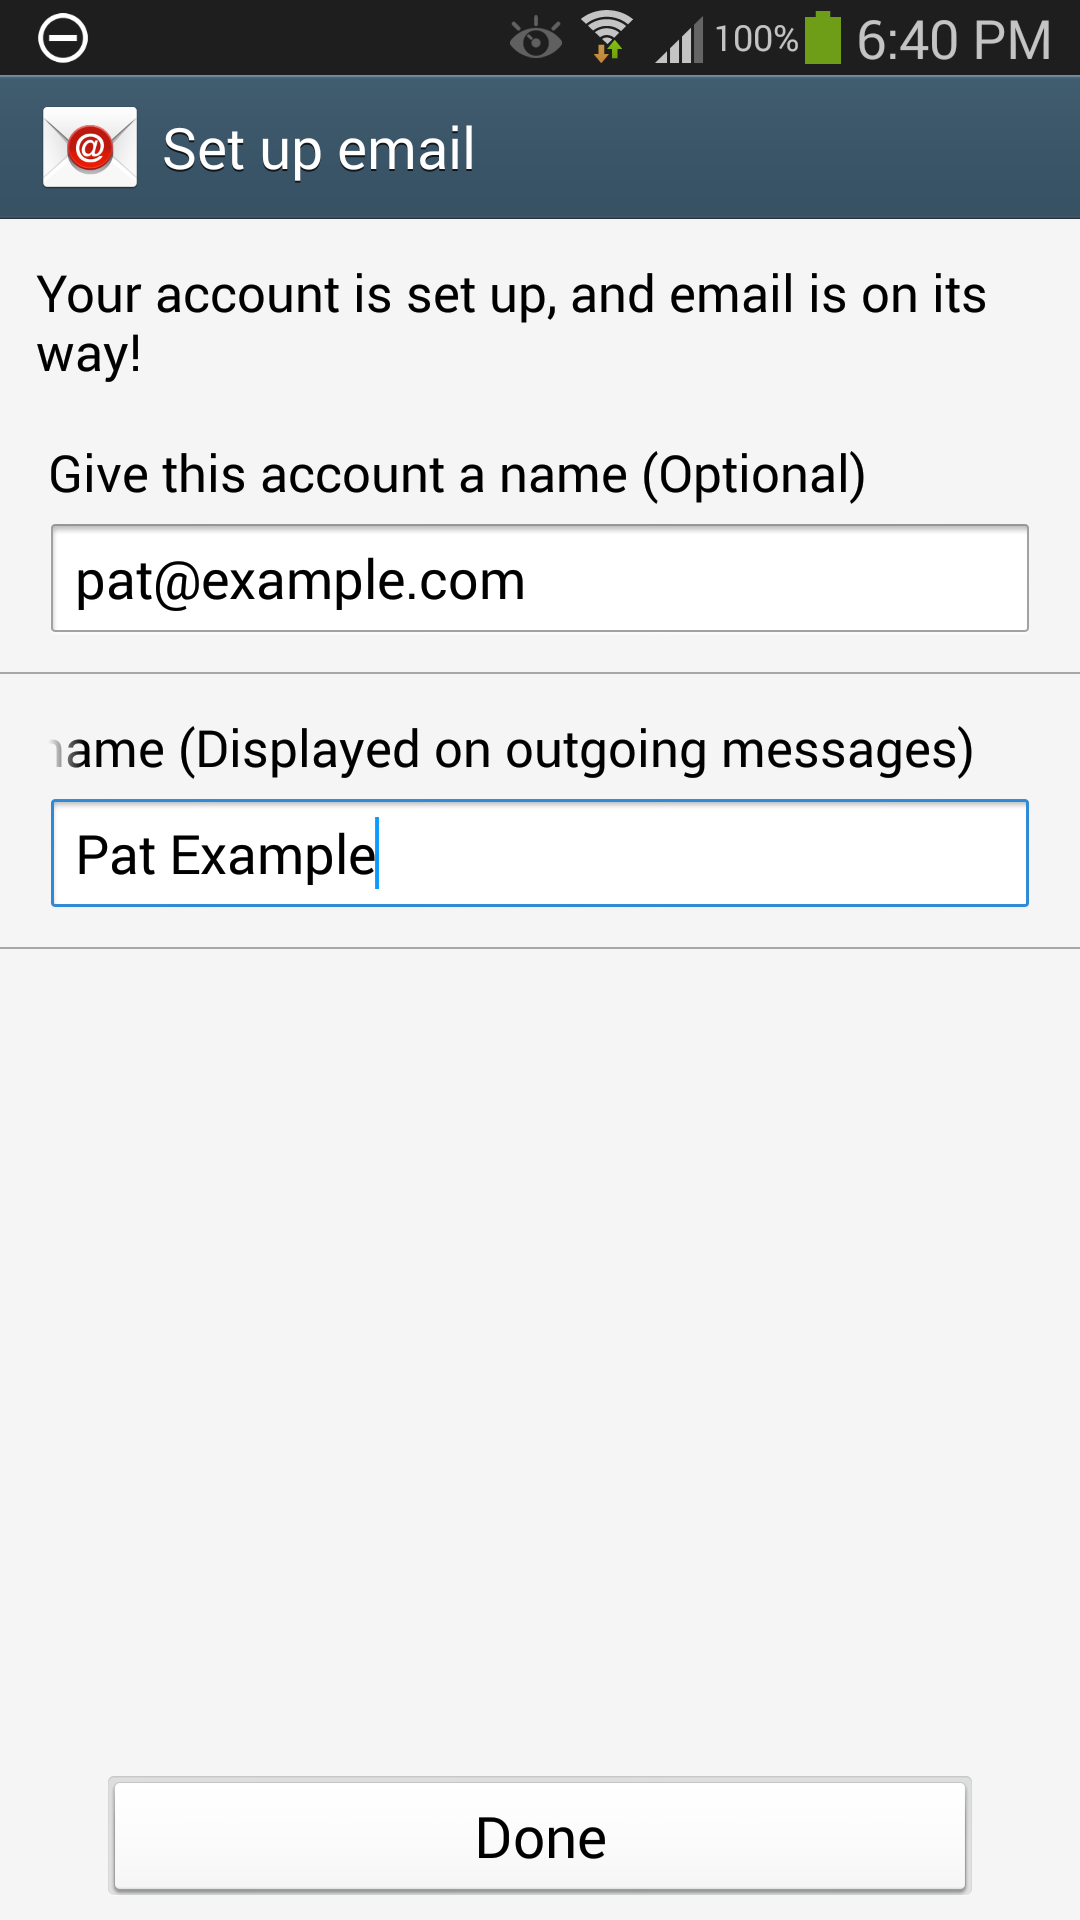
After you configure your email sync options and your settings have been verified, you can then set a name for the account, and enter the name you want displayed on outgoing messages. Touch "Done" to complete the setup.